 "crowmolly" (crowmolly)
02/16/2018 at 12:20 • Filed to: Muncie, 4 Speed, Embiggen this
 24
24
 28
28|
"crowmolly" (crowmolly)
02/16/2018 at 12:20 • Filed to: Muncie, 4 Speed, Embiggen this | 24
| 28 |
Among “old-timers”, the Muncie transmission commands a certain degree of respect. Sure, you could get a manual in tons of cars from GM during the 60's and 70's, but the Muncie was the one to have. Saginaw transmissions were cheaper, and worked admirably, but scattering gear oil on the pavement was a scary reality if you pushed them too hard. So for many years “4 speed Muncie” was a big selling point in the automotive classifieds. They’d also pull a decent buck at the local swap meet- if they were there at all. Nowadays it’s outclassed by modern manual transmissions in pretty much every metric except simplicity and weight. A TR6060 or T56 will hold more power, shift easier, leak less, have a shorter first gear for acceleration and two overdrive gears to keep the revs down on the highway.
However there’s still something
cool
about the Muncie. Maybe it’s the fact that it’s rebuildable at home if you pay attention and have access to a shop press. Maybe it’s the fact that it’s light enough for one person to easily remove and install. Or maybe it’s because GM’s best of the best came with it during the height of the original muscle car era. Regardless of reason, there’s some things to know about the design- especially if you are going to be owning or shifting one. But first, a quick history lesson.
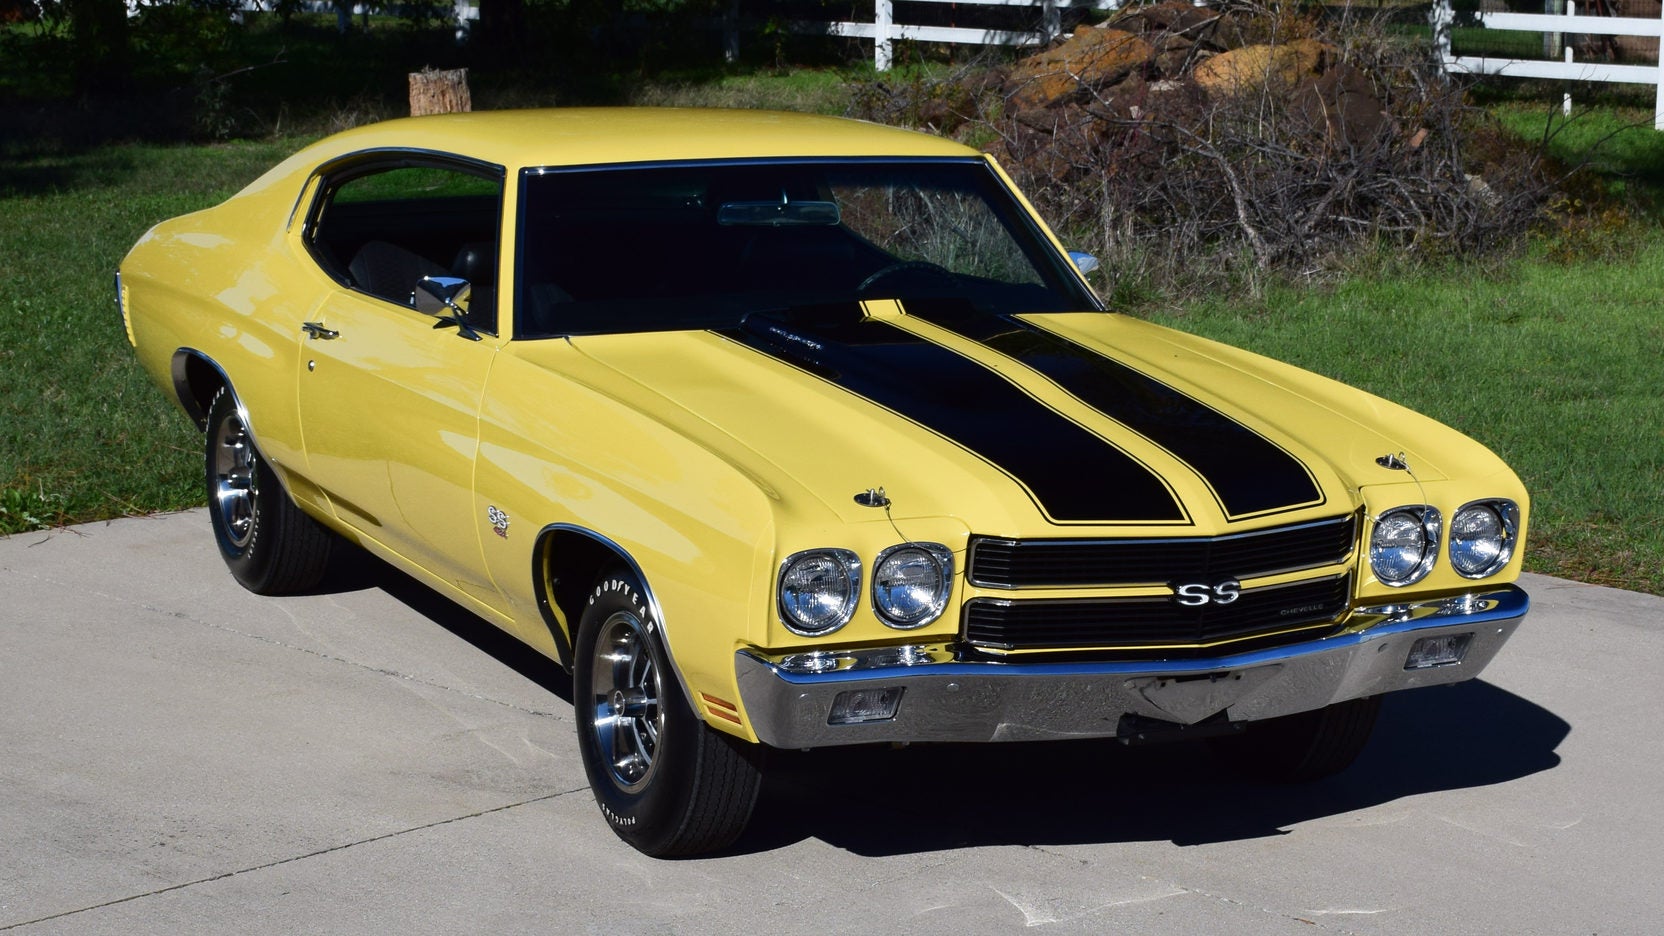
Muncie 4spd in a ‘69 Z/28
In the early 60's most of GM’s manual hot rods came with the Borg-Warner T10 (note: not the
Super
T10, that came later and replaced the Muncie). The T10 was a decent transmission in its own right, however it was not ready for the new power coming out of GM’s engine division. They needed something more modern, and the T10 was on borrowed time. That something came in 1963- the Muncie 4 speed.

A 10 spline Muncie M21 transmission
1963 would be the first year for the Muncie, where it would be installed in the Corvette and some full-size cars. As with most major car components, there were year-to year changes during the Muncie’s run from ‘63 until ‘74. During its time there were three main “versions” of the transmission, usually referred to by their GM RPO (Regular Production Option):
M20 , the most common. It is sometimes referred to as the “wide ratio” trans since the gear ratios are further spread apart.
M21 , the next most common. It is sometimes referred to as the “close ratio” trans as the gear ratios are closer together in comparison to the M20.
M22 , the rarest of the bunch. It’s nickname is the “rock crusher” due to the noise generated by the gearset. The gear ratios are the same as in the M21, but the tooth angle is different. You’ll get more gear noise, but you’ll also get more strength.
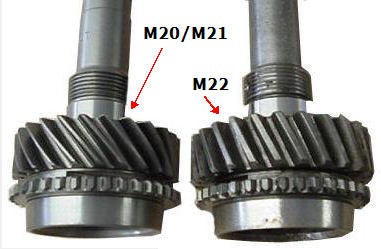
M20/M21 tooth angle vs. M22. Image credit where credit is due, I could not find an origin.
Regarding strength, I have never seen official numbers but it’s kind of accepted that the stock M20 will be good with 400hp, the M21 450hp, and the M22 500hp (speaking in terms of SAE Net horsepower). You’ll get people that will argue about more or less and that they’ve slammed their M20 with 500hp+, but this is what I’ve seen from reputable sources. With modern parts, however, you can build a Muncie to take significantly more.
Now on to some more technical stuff- internals of the trans.
Gear ratios themselves were different in the early M20 transmissions (1963-1965) and then had no further changes during the rest of the Muncie’s production.
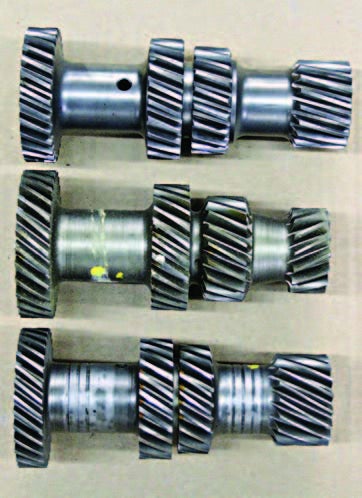
Muncie gearsets. Image from ChevyDIY.
1963-1965
:
M20 wide ratio 2.56 first, 1.91 second, 1.48 third, 1.00 fourth
M21 close ratio 2.20 first, 1.64 second, 1.28 third, 1.00 fourth
No M22 available during this time
1966-1974 :
M20 wide ratio 2.52 first, 1.88 second, 1.46 third, 1.00 fourth
M21 close ratio 2.20 first, 1.64 second, 1.28 third, 1.00 fourth
M22 close ratio HD 2.20 first, 1.64 second, 1.28 third, 1.00 fourth
Input, output, and countershafts:
Muncie input shafts. Image from Chevellestuff.net
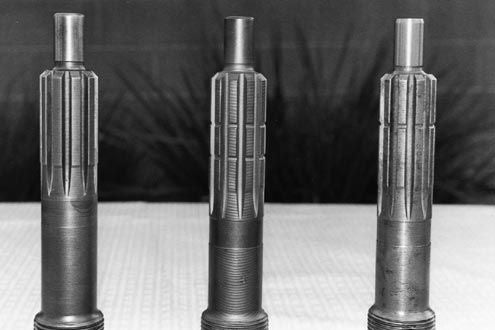
Input shafts come in seven different flavors. Really what you need to be concerned with are the number of splines and the number of rings.
Why should you care?
This is one way you can ID a Muncie- count the rings on the input shaft. It’s not 100% accurate since parts can be mixed and matched over the years, but it’s close. You don’t want to spend M22 money for a beat M20. Also, your input shaft spline count is what you need to know when you go to buy a clutch disc . So here’s the list:
1.) 1963-1965 M20s have 10 splines, 24 gear teeth, and no rings.
2.) 1966-1970 M20s have 10 splines, 21 gear teeth, and two rings.
3.) 1970-1974 M20s have 26 splines, 21 gear teeth, and two rings.
4.) 1963-1970 M21s have 10 splines, 26 gear teeth, and one ring.
5.) 1970-1974 M21s have 26 splines, 26 gear teeth, and one ring.
6.) 1967-1970 M22s have 10 splines, 26 gear teeth, and no rings.
7.) 1970-1974 M22s have 26 splines, 26 gear teeth, and no rings.
Output shafts are simpler: there are two. All 10 spline input shafts come with a 27 spline output shaft. All 26 spline input shafts come with a 32 spline output shaft. You need to know this so you can match up your driveshaft yoke.
There are two countershafts as well. 1965 and earlier had a 7/8" countershaft, 1966 and later had a 1" countershaft. You need to know this if you plan on purchasing a rebuild kit. Years ago I was told by a reputable Muncie builder to only buy rebuild kits that come with a new countershaft. It’s great advice- more on that a bit later.
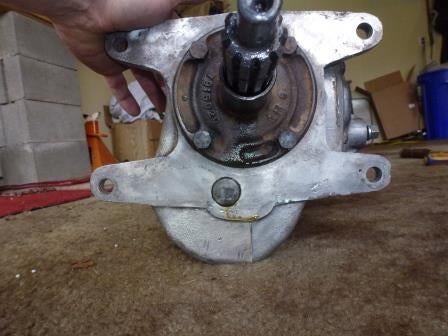
Main cases :
The big thing here is that 1963-1965 Muncies had a 7/8" countershaft and 1966-1974 had 1" countershafts. Oh, and the ‘63 Muncie had a smaller front bearing.
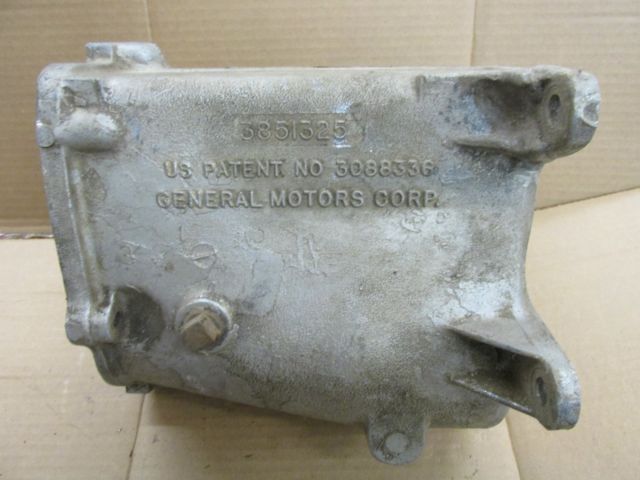
Image from ebay.com
The cases are made of cast aluminum, and can be positively ID’d by the casting number up top. This is a -325 case, which means it’s from a 1964-1965 vehicle. It may also have a partial VIN stamped on the side. If you are buying a trans or an empty case, look at the aluminum that the drain plug goes into. Look for signs of cracking as people are known to put too much torque into fasteners that go into aluminum.
The case itself is a bit of a weak point for the Muncie. There are two main reasons why (in my opinion):
First is the dreaded “Van Gogh” mod. Muncies have been known to bust ears off of the main case from too much torque, careless installation, and/or poor bellhousing alignment. There’s no shortage of cases like this out there, and while you can get it fixed by a welder (especially if you have the missing ear) sometimes it’s easier to just get a new case. Or, if you have the money, to upgrade the case to one made by AutoGear.
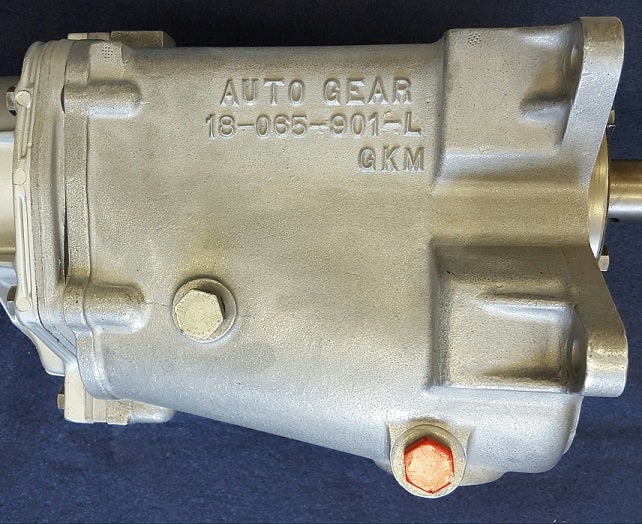
Unknown source. Maybe Autogear themselves. They make great stuff.
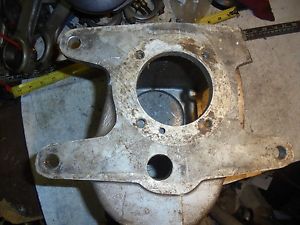
The Auto Gear case is much stronger and is a great addition to a Muncie build. There’s a lot of upgrades to the design, starting with greatly reinforced “ears”. These things are used as the base to transmissions that are built for big power. It also addresses the second Muncie issue, that of a leaky countershaft hole:
You can see it here. The countershaft is the circle at the bottom of the trans. What happens is this: the countershaft is a press fit into the hole in the main case. If the fit is sloppy (due to wear or abuse) the countershaft will spin in the hole and gear oil will leak out. It’s a very common occurrence, and more of an annoyance than anything else. Sadly, there’s no “easy fix” for a weepy countershaft hole. From what I can tell the only ways to fix it are to do some repair work to the case itself or replace it with an Autogear or a known-good stock main case. Most people just live with it. I know I did for a while.
Tailhousings are pretty much standard, with the only differences really being for ‘63-’65 Pontiacs and 27 vs. 32 spline output shafts. Not much to report.
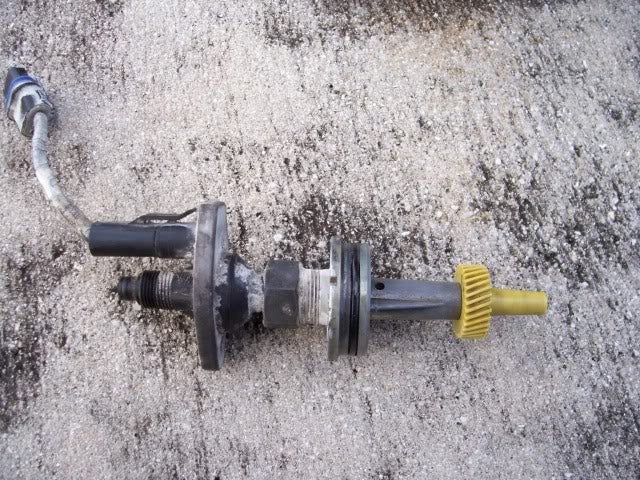
Inside of the tailhousing will be the speedometer connection, shown here.
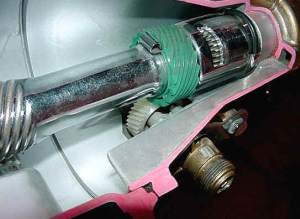
Image source unknown
In green is the drive gear, which is usually made of metal. They are somewhat involved to swap. There are three kinds:
1.) 8 tooth 1.84" diameter gear.
2.) 8 tooth 1.76" diameter gear.
3.) 6 tooth 1.92" diameter gear (pretty rare).
You can check which gear you have without counting teeth by measuring gear width. The 1.76" gear is 0.53" wide and the 1.84" gear is 0.61" wide.
This is something you need to identify when you go to select your driven gear, which is the plastic gear underneath the drive gear. This is easy to change and is how you can calibrate your speedometer. There are online tools that help you figure out which gear you need. Just be sure to match the right drive and driven gear pair or you will chew up plastic driven gears.
Side Covers are not really noteworthy aside from this:
Some have studs for shifter tab mounting:

Image from 4speedconversions
While others have holes for bolts:
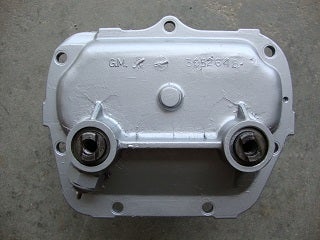
Image from NastyZ28.com
This is dependent on the year of the trans, but it’s easy to spot. Just make sure you get shifter linkage that matches your Muncie.
Now on to the fun stuff. Maintaining and using your Muncie.
Maintenance is pretty easy. With early cases (1963 to 1969, with the exception of all M22s) there’s no drain hole, so you have to remove the square-headed plug and siphon the old fluid out of the fill hole. Newer cases (1970+) have a drain plug that’s lower on the case, so that’s what you remove to get the old fluid out.
This is an early case with no drain hole. It has a boss you can drill and tap if desired. If you do, add a magnetic plug and not just any old one from the hardware store.

This is a later case (1970 I believe) with the drain hole drilled and tapped.
Once the fluid is out, you fill the trans through the fill hole until the fluid *just* starts to weep back out. As you might guess, you should do this on level ground if possible. When either plug goes back in, use sealant on the threads as they are NPT and require it. Do not over torque the plugs. The trans will take 80W90 conventional gear oil. Some people like to use synthetic fluid but I don’t really think it makes that much of a difference.
If you have to rebuild the trans, both good kits and good help are pretty easy to find.
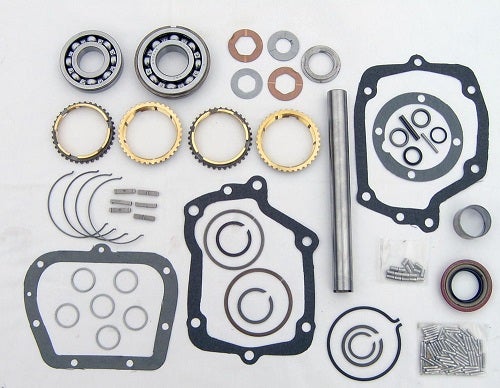
I’m not going to go too far into the details, but it’s a good idea to get a rebuild kit that includes a new countershaft, especially if your trans was weeping out the front hole. There are also excellent books and videos out there on rebuilding a Muncie. From what I recall, really the only specialty tools you will need is access to a press and snap ring pliers. Oh, and make sure you chill a six pack of your favorite beverage in the fridge when you are working with the needle bearings. You may need it afterward.
Since we are kind of on the subject...
Note: This is not sponsored by Autogear, but they make such nice stuff I have to give them a shoutout.
!!! UNKNOWN CONTENT TYPE !!!
Not only do they sell the upgraded maincase, but also cast iron (vs. the stock aluminum) midplates, upgraded tailhousings, modern gearsets, you name it. Hell, they even offer a gearset with an overdrive 4th and specialty sliders that help if your gear engagement teeth are worn. Definitely worth a look if you are going to crack open your trans or are looking to make some upgrades.
Finally, shifting and driving.
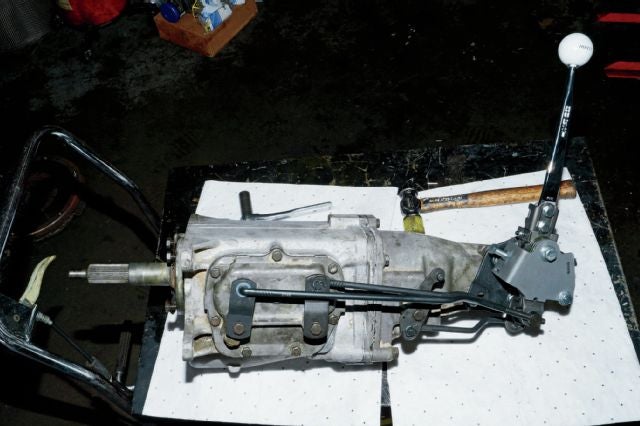
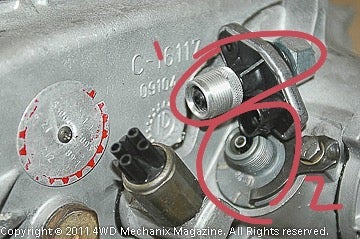
Shifters are pretty easy to install. The main shifter body bolts to the tailhousing, and you put an alignment pin in the shifter (down near the tabs) to lock it in neutral. Then you attach the tabs to the trans, adjust the rods to the proper length, and then clip them in place. When it’s all done and not binding (the rods are not hitting each other) you just set the shift stops, pull out the alignment pin, and put the trans in the car. Backup light switch mounting can vary, but it usually looks something like this:
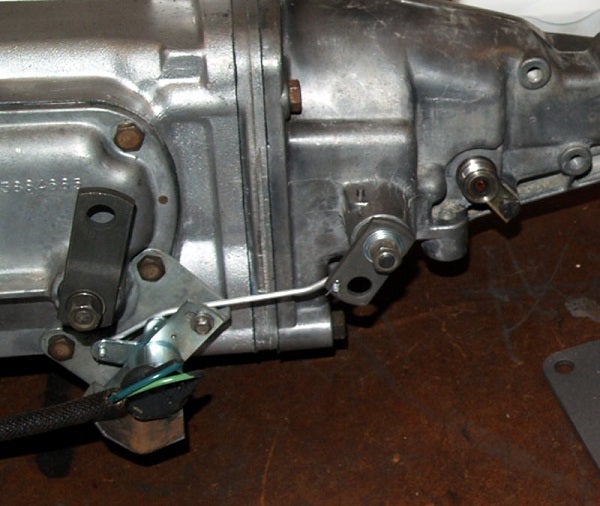
Note that it’s just a rod coming off of the shifter tab, and it pulls an arm on the factory switch.
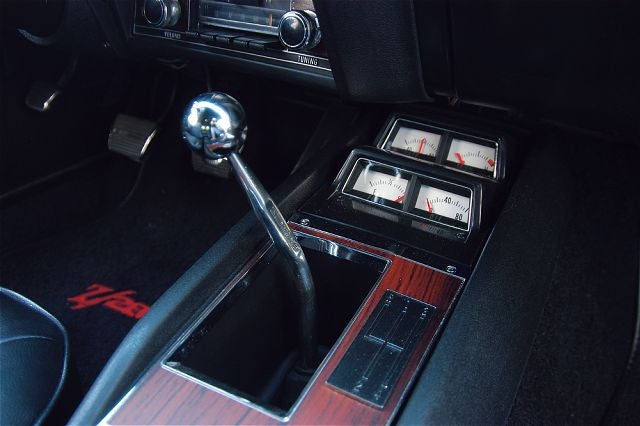
Regarding shifters themselves, the stock unit works OK but it’s been known to bind up during hard shifting. So many people replace it for a Hurst Competition Plus which is far more positive in feel. If you *really* want to get a no-compromise shifter you can get a Hurst Super Shifter III, which has a handle for reverse lock-out and reinforced straight shift rods (to take harder abuse). Just know that you have to cut your trans tunnel for the rods to clear. With whatever you choose, just know it’s probably going to be a bit higher shift effort than you may be used to in a modern car.
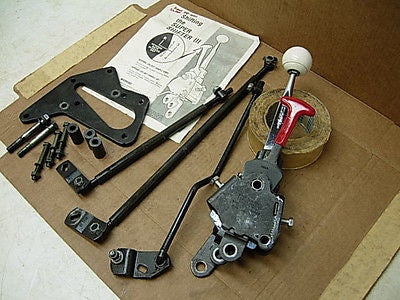
Hurst Super Shifter 3. You use the red handle to engage/disengage the reverse lockout
Operation? Hey, it’s simple. Reverse is up and to the left, and you may need to push through a lockout gate or lift a handle (such as in a Corvette) to get there. Other than that, it’s a 4-speed! Do this to it!
This guy knows what’s up. There’s nothing quite like powershifting an old muscle car.
 HammerheadFistpunch
> crowmolly
HammerheadFistpunch
> crowmolly
02/16/2018 at 12:40 |
|
Im not a muscle car guy at all, but damn do I love a good technical gear post!
 Future next gen S2000 owner
> crowmolly
Future next gen S2000 owner
> crowmolly
02/16/2018 at 13:07 |
|
How much time is power shifting really good for?
|
crowmolly
> Future next gen S2000 owner
02/16/2018 at 13:12 |
|
Probably a few tenths. But it’s a blast if you do it right. Barking 1-2 is from the heavens.
|
crowmolly
> HammerheadFistpunch
02/16/2018 at 13:12 |
|
Thanks!
 sn4cktimes
> crowmolly
sn4cktimes
> crowmolly
02/16/2018 at 13:15 |
|
Wow, this was really in-depth. Now, if only I could find someone who knows this kinda info on AMC/Jeep transmissions I could figure out how to solve my 88' Eagle’s FI conversion speedometer cable issue.
|
crowmolly
> sn4cktimes
02/16/2018 at 13:16 |
|
What’s the issue?
 vondon302
> crowmolly
vondon302
> crowmolly
02/16/2018 at 13:17 |
|
Learned to drive stick with a rockcrusher in a Chevelle. Can confirm easy to replace by yourself and the ears are very easy to break. I never should have sold that car.
Great post!
|
sn4cktimes
> crowmolly
02/16/2018 at 13:38 |
|
So 88' Eagle has a cable controlled speedo that runs into the transfer-case adapter housing and is held in with two clips. The FI conversion kit (specifically for a CJ/YJ) requires the adapter housing to be a screw-in-cable-style so that you can attach an external electrical adapter between the cable and the housing to send a signal to the new computer so it knows the car is in motion.
But between all the years and Jeep parts there’s both long and short housings and cable ends, and multiple combinations of gears at the end to keep the speedo in the right ratio for how the diffs are geared and the tire size.
I’m not sure what adapter housing to get, what cable, and what gear. I kinda get stuck with the overload of info. There’s calculators for the Jeep boys but I need “the knowledge”
 Schaef_Camaero Z/28
> crowmolly
Schaef_Camaero Z/28
> crowmolly
02/16/2018 at 13:39 |
|
Nice write-up!
|
crowmolly
> sn4cktimes
02/16/2018 at 13:49 |
|
So this style (the 3.59x stuff)?
 cmill189 - sans Volvo
> crowmolly
cmill189 - sans Volvo
> crowmolly
02/16/2018 at 14:41 |
|
Nice job.
Can you elaborate on the drain/refill process? How would you fill through the same hole you somehow drained from? I’m familiar with the traditional setup of draining from a low port and filling till it weeps from another higher up and the annoying versions that don’t have a drain plug but just a fill. Those require suction to remove the old fluid.
|
sn4cktimes
> crowmolly
02/16/2018 at 14:41 |
|
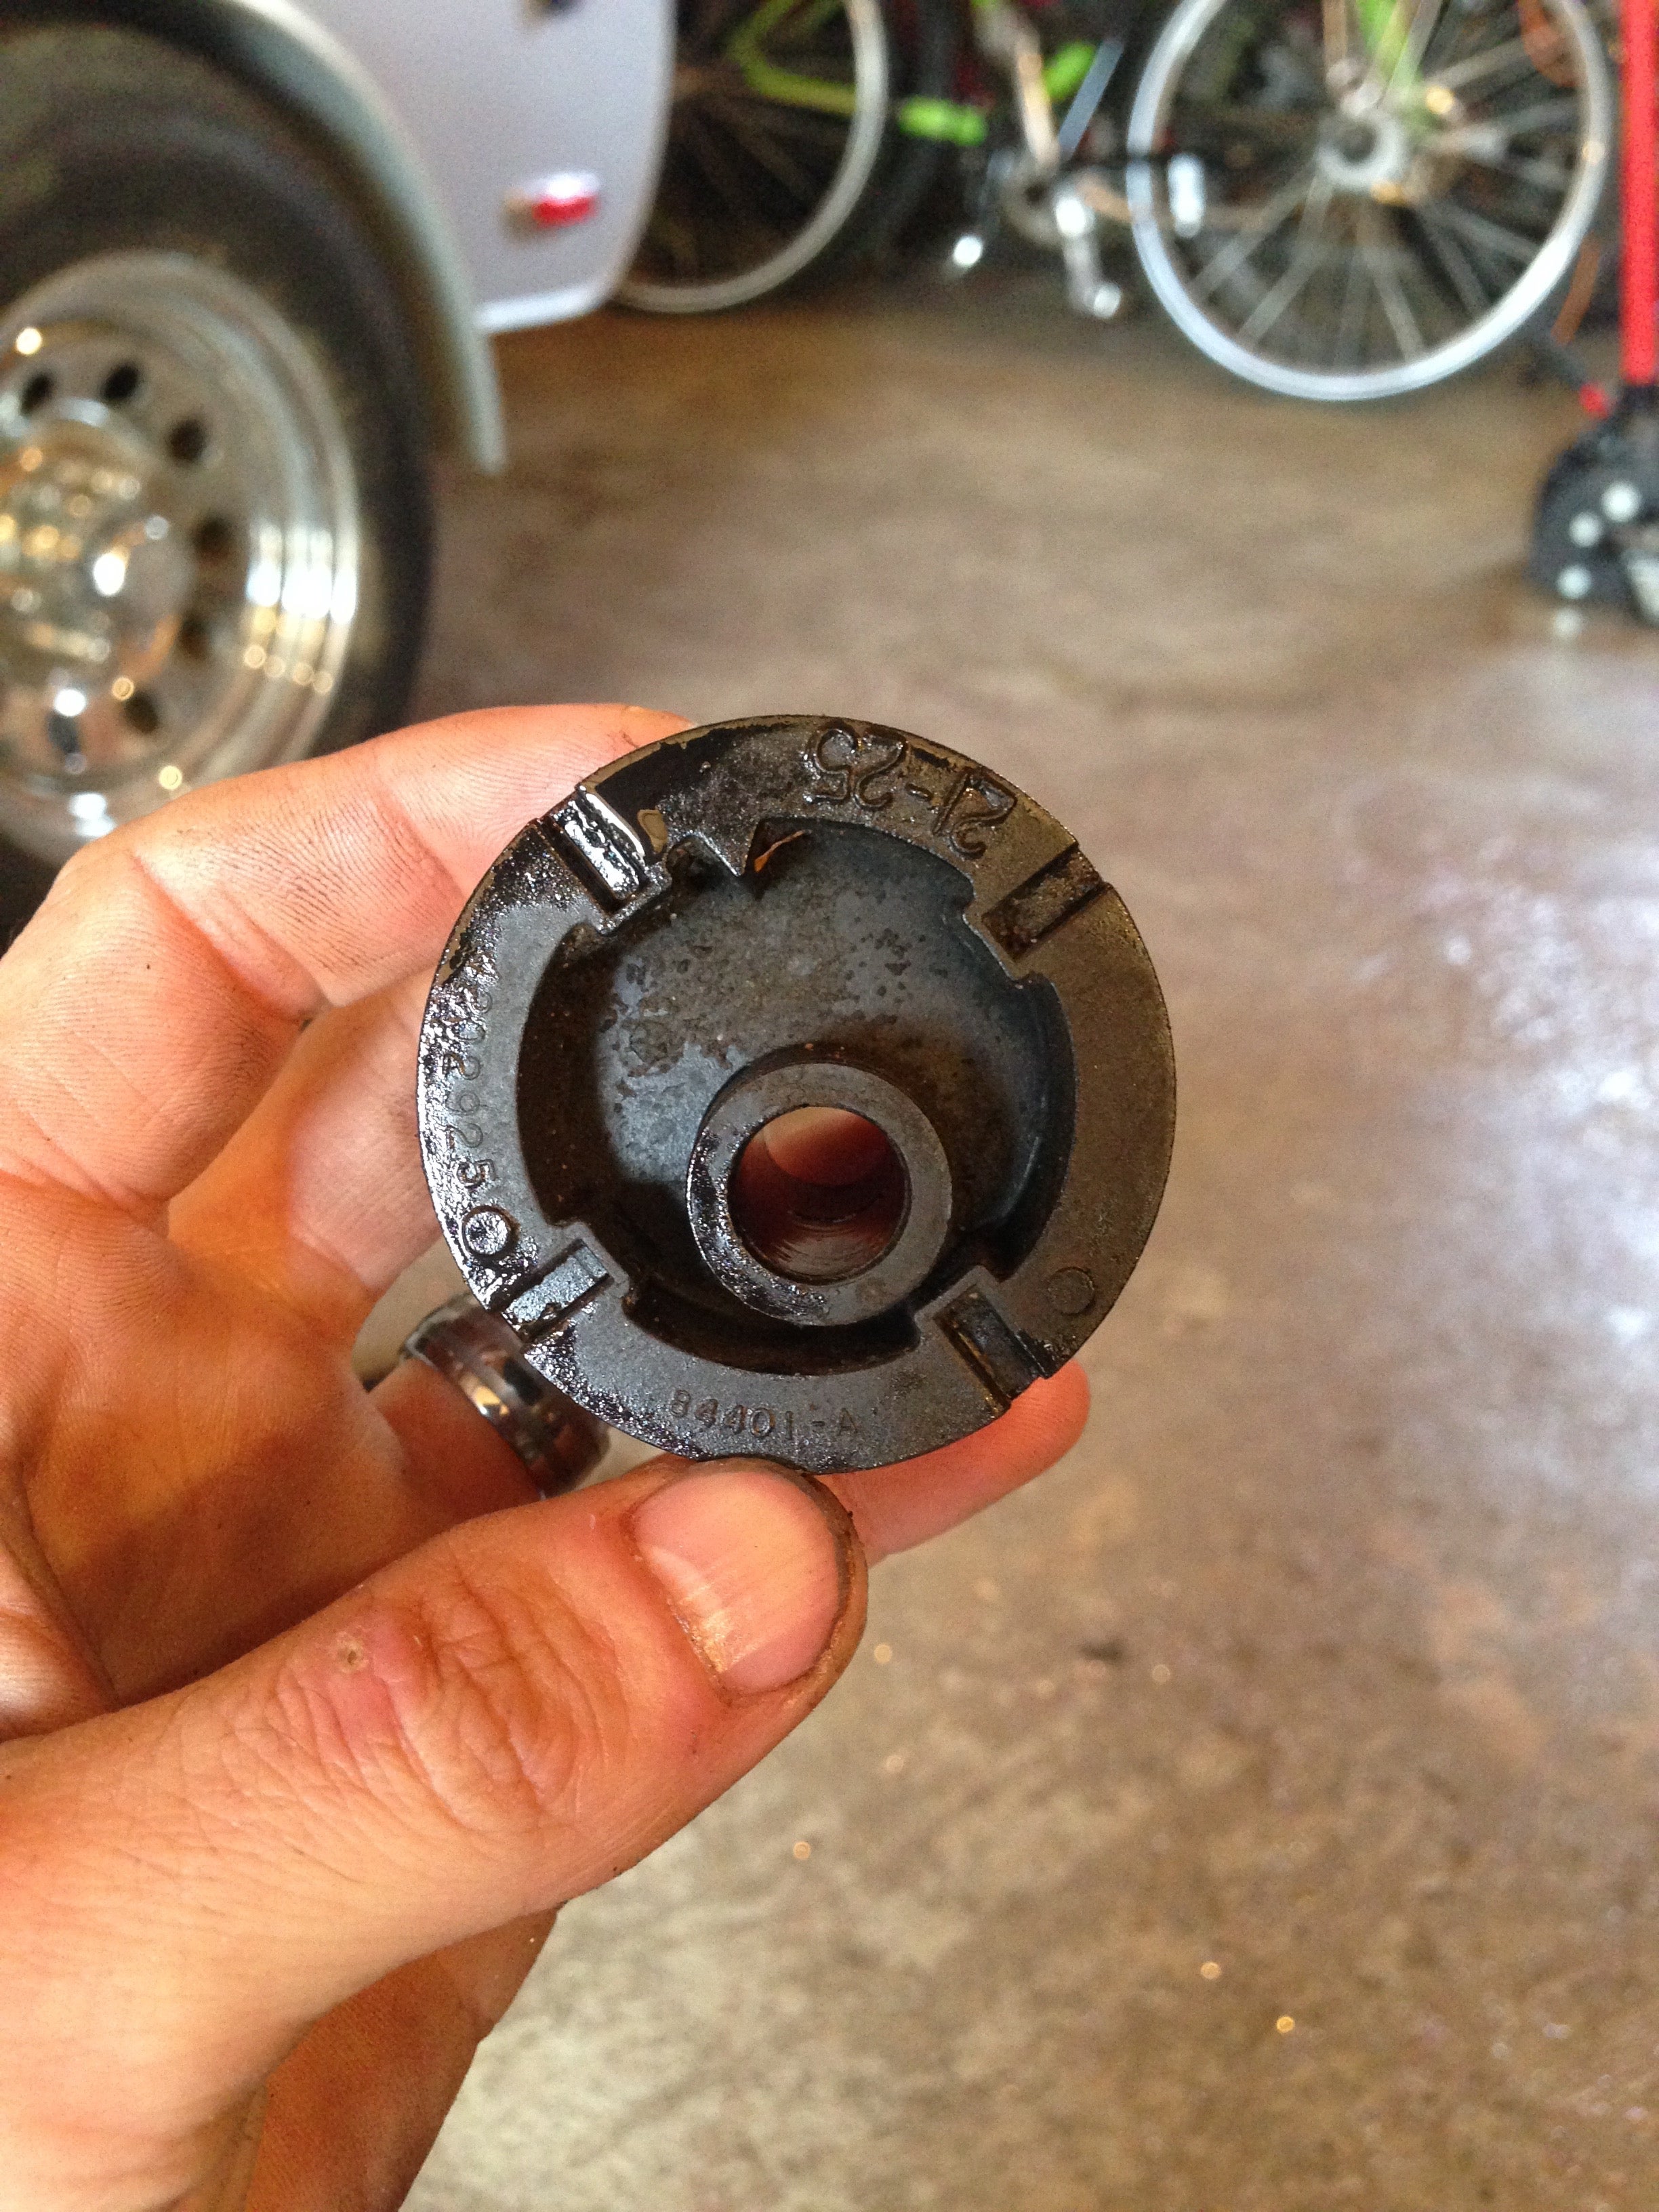
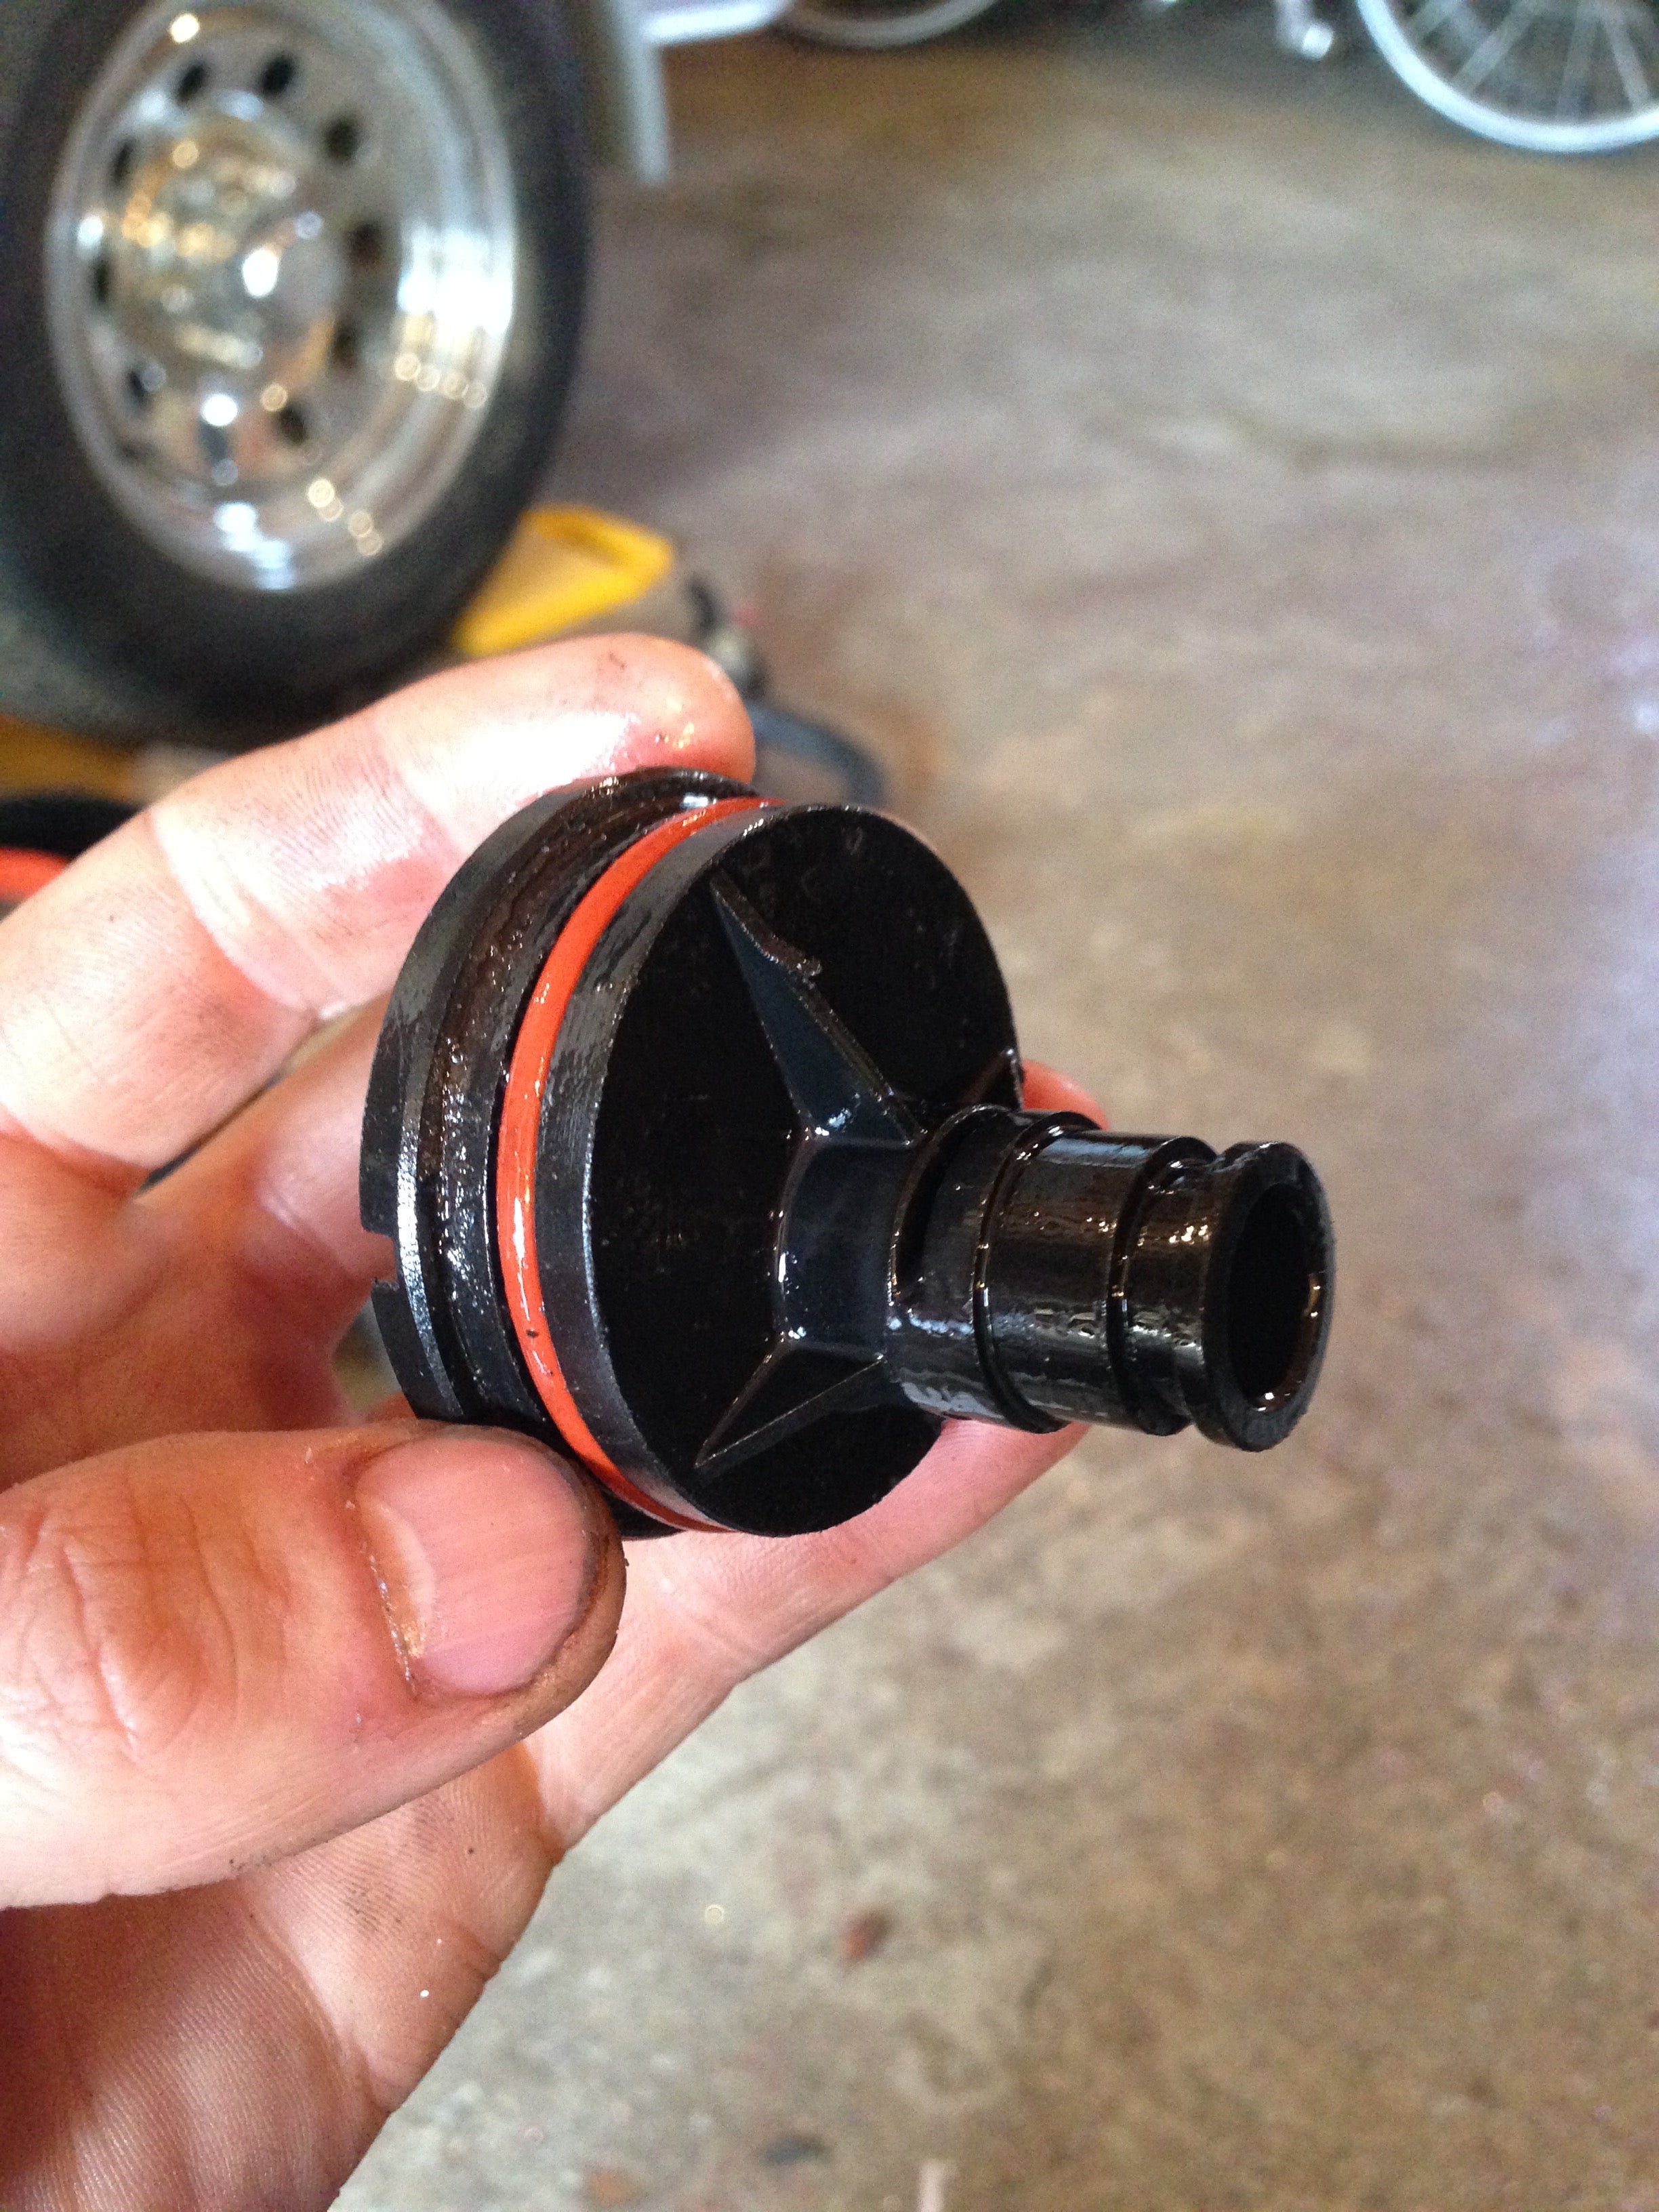
Yeah, specifically the housing adapter 3.591-2 and then the gears at the end 3.591-1. My 3.591-2 doesn’t have a threaded outside. The cable just passes through and is “sealed” via some o-rings and then held in place on the inside of the housing with two clips. Here’s what I’ve got going on:
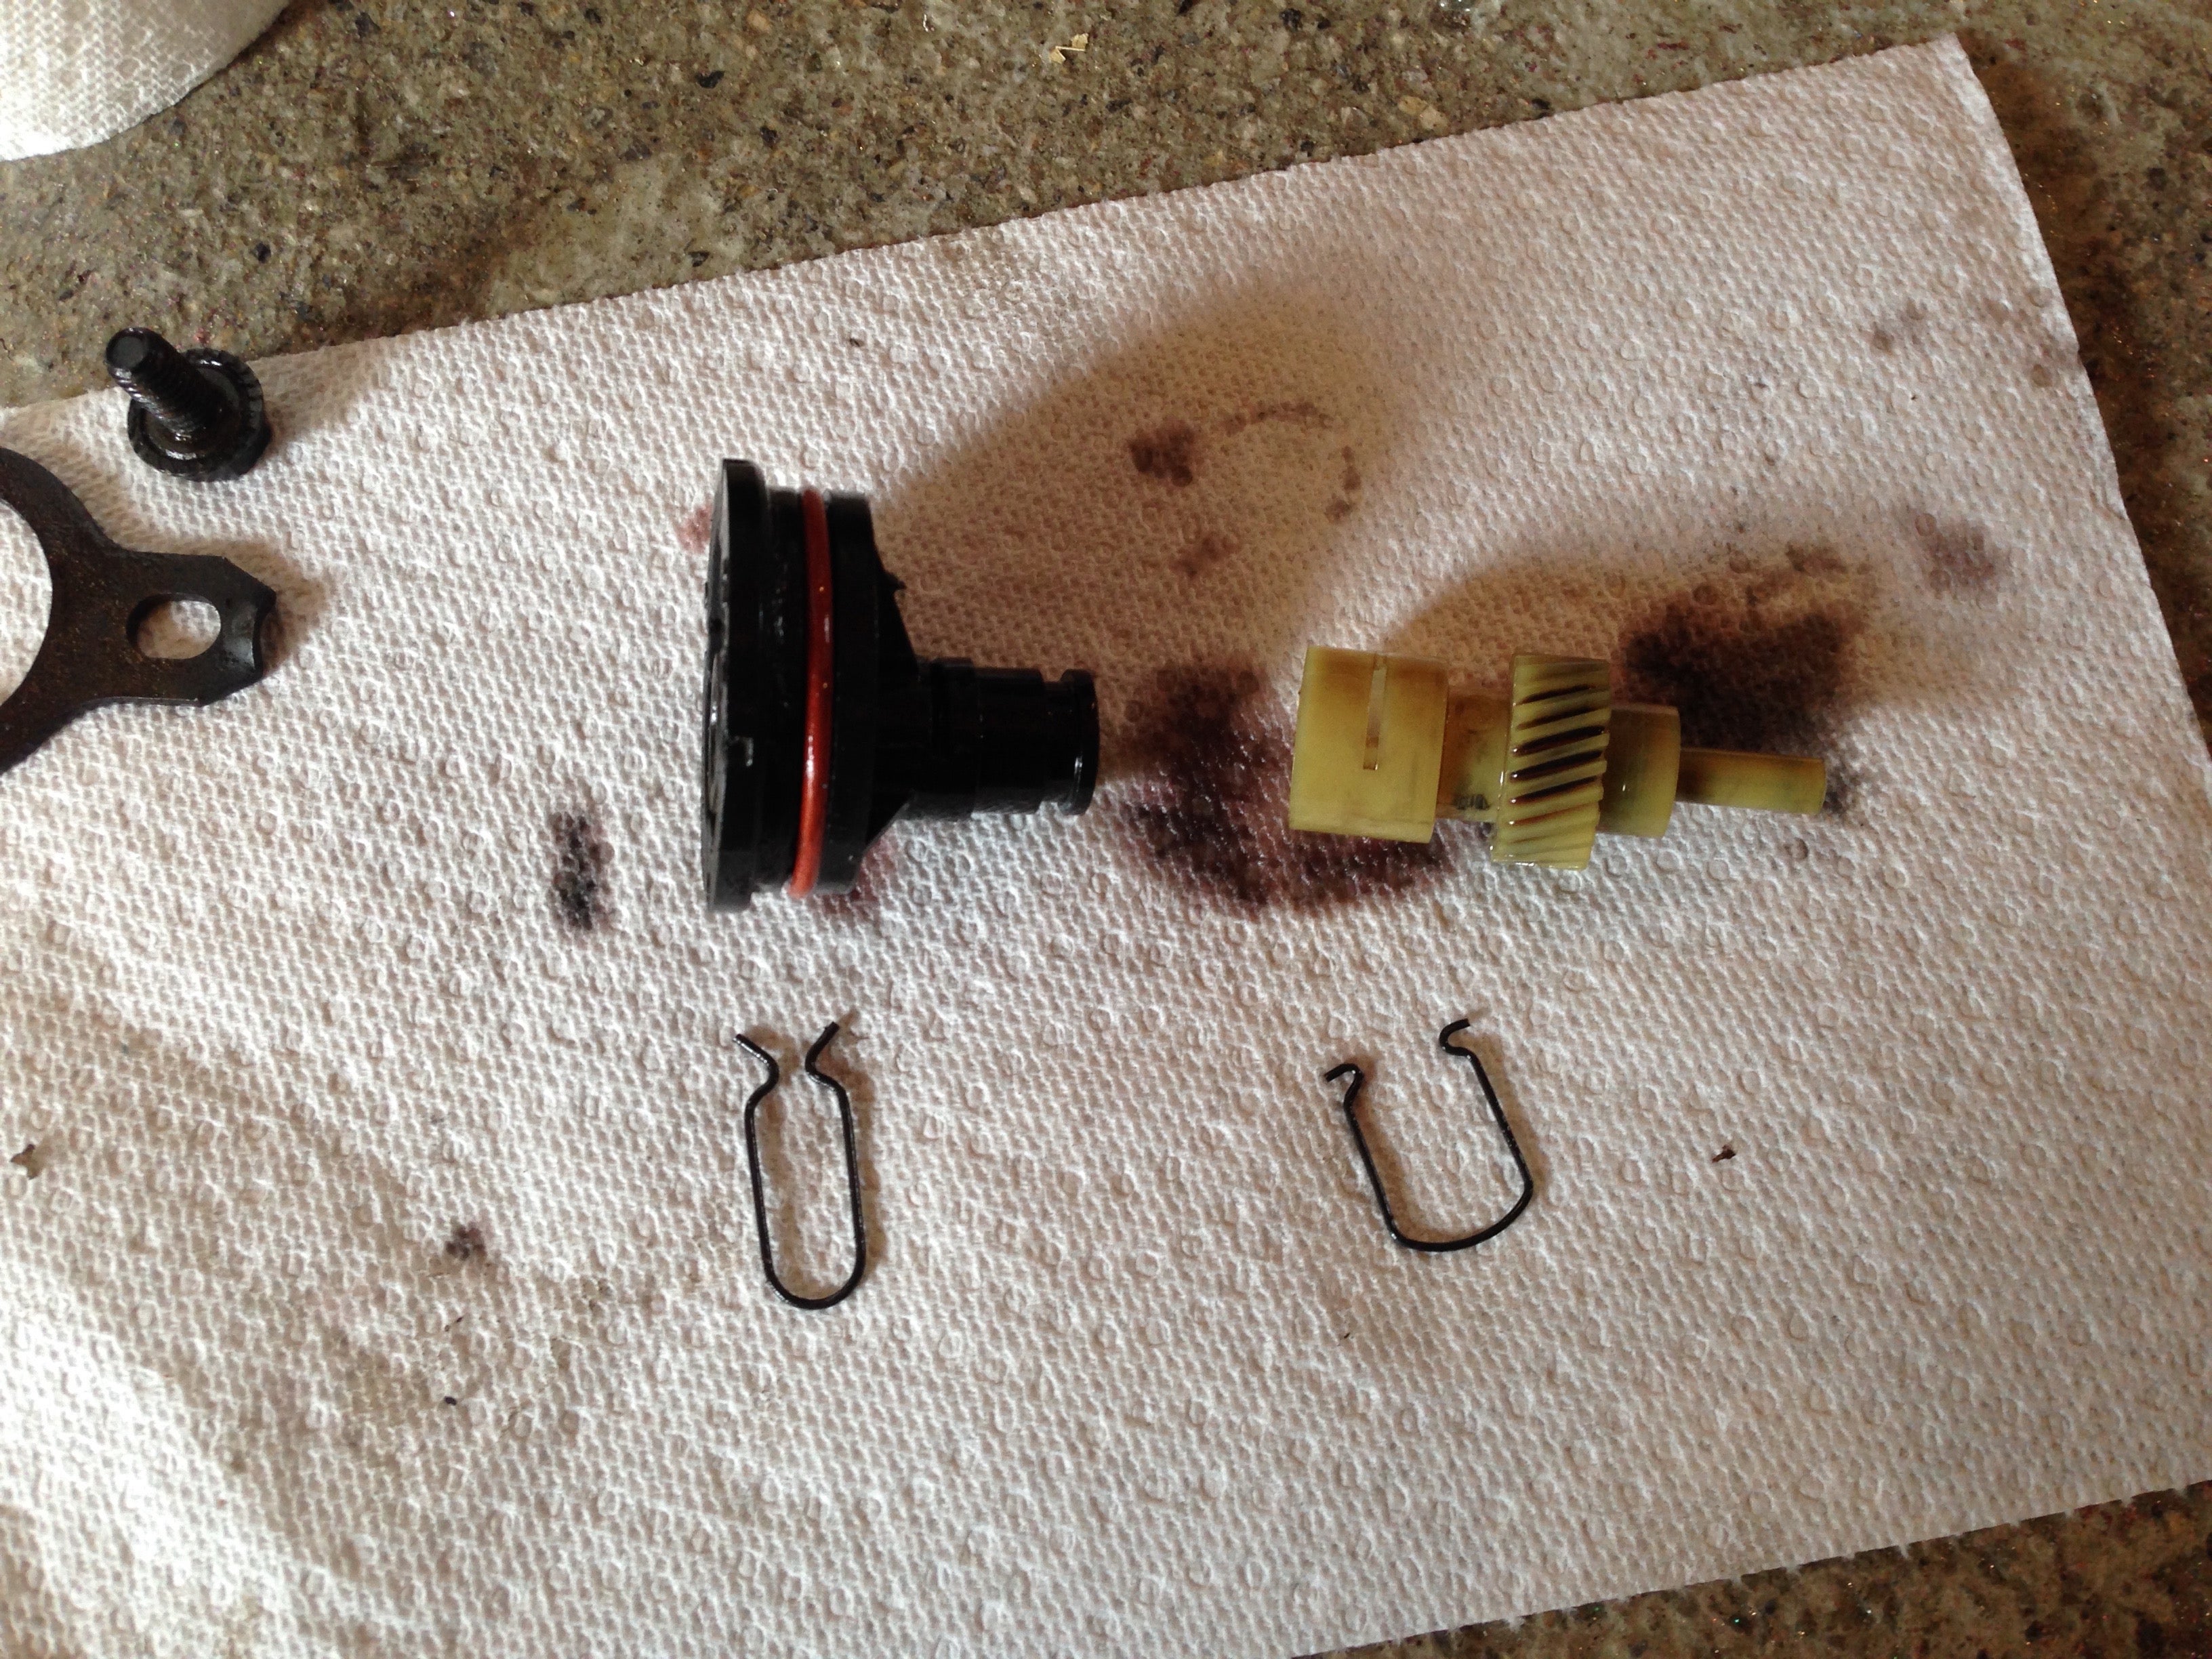
So I’m assuming I need a new cable, housing, and gear-set.
 Die-Trying
> crowmolly
Die-Trying
> crowmolly
02/16/2018 at 15:00 |
|
REAL nice writeup....... the nice thing about the muncie over the saginaw, is that you can shift/yank the gears in the muncie at over 5k rpms because of the shaft set up. the shafts in the saginaws flex, and wont go into gear until the rpms come back down low enough......
|
crowmolly
> sn4cktimes
02/16/2018 at 15:04 |
|
Hmm. Maybe something like this setup?
https://www.hemmings.com/blog/2008/09/29/hmx-finally-a-vss-that-works/
One cable goes in to the VSS which creates the signal and then a new cable runs up to the speedo.
|
crowmolly
> Die-Trying
02/16/2018 at 15:04 |
|
Thanks DT!
|
sn4cktimes
> crowmolly
02/16/2018 at 15:29 |
|
Not sure if I can split the cable like that in my case.. I’d have to chase it for the full run, but I’m fairly sure it’s a single end-to-end cable.
I think I can just yank the parts off an automatic YJ, just not sure yet. Might need to be a specific year and/or ratio.
I have this exact external adapter (top circle) but do not have the lower or applicable cable.
This is kinda the whole thing put together. This shows an extra plug for the wiring harness, my wire is MUCH longer than that. Is a straight shot from the adapter to the ECU.
The kit does specify to put the external adapter directly onto the housing adapter in the transfer case... So I’m guessing it’s taking the cable length into consideration. I’ll hafta get under there and confirm the single cable theory. BUT, it’s also good to know they make a thread-size adapter. That may make life easier.
And as you can see my gear on the end is also a different style. It has that extra ridge. Not too sure how important that is to maintain.
|
Die-Trying
> crowmolly
02/16/2018 at 15:41 |
|
thanks for putting it up, i love a good piece on identifying, and differences. this was a good piece....
been seeing them go for around $750 low end at swap meets, and $1000 for nice recently gone through ones. usually the m20s. people are downright proud of the m22, and for good reason......
 AestheticsInMotion
> cmill189 - sans Volvo
AestheticsInMotion
> cmill189 - sans Volvo
02/16/2018 at 20:34 |
|
I was wondering about this too. Fill from the top and pump out from the top as well...?
|
AestheticsInMotion
> crowmolly
02/16/2018 at 20:36 |
|
This was a fantastic read. Technical, but still easy to understand for a mechanical novice.
So this is going to be a new series right? :)
 Rust and Dust - Oppositelock Forever
> crowmolly
Rust and Dust - Oppositelock Forever
> crowmolly
02/17/2018 at 08:13 |
|
I was actually working at work (gasp) when this post went up, so I’m kind of late to the party, but this is excellent Oppo.
|
crowmolly
> Rust and Dust - Oppositelock Forever
02/17/2018 at 13:08 |
|
Thank you sir!
|
crowmolly
> cmill189 - sans Volvo
02/17/2018 at 13:28 |
|
Yeah, I messed that up. Wasn’t clear, I was editing it too quick and I mixed up the two cases in my head. Sorry, it’s updated now. Thanks for letting me know!
|
crowmolly
> AestheticsInMotion
02/17/2018 at 13:29 |
|
I messed that part up, it’s updated now. Thanks!
 MM54
> crowmolly
MM54
> crowmolly
02/18/2018 at 15:37 |
|
I swapped an M20 with a hurst competition plus into the Chevelle last year, hardly had time to drive it before the weather turned to salt, but I can confirm it is good.
Even with the 100k mile engine that burns as much oil as it does gas...
|
cmill189 - sans Volvo
> crowmolly
02/20/2018 at 17:48 |
|
Thanks for the update!
 19JRC99
> crowmolly
19JRC99
> crowmolly
04/14/2018 at 23:59 |
|
I so want a Rockcrusher for the Camaro. That gear whine is just.... mmm....
 DannyBamm
> crowmolly
DannyBamm
> crowmolly
10/05/2018 at 12:16 |
|
PAUL CANGIALOSI. ! 5SPEEDS. COM
HE IS THE GUY THAT WROTE THE BOOK ON MUNCIE TRANSMISSSIONS! HE SIMPLY MAKES THE BEST MUNCIE TRANNY THAT MONEY CAN BUY! HE HAS HIS OWN YOUTUBE CHANNEL THAT IS ADDI CTING!
GEARBOXVIDEO - YOUTUBE
ENJOY THE ONE STOP SHOP
 hillrat
> crowmolly
hillrat
> crowmolly
08/21/2020 at 08:26 |
|
NEVER LIFT!!!!!!